VOL. 5, NO. 12 / APRIL 1987 / PAGE 30
 Antic
first saw BTL Hard Disks in action at the San Jose Atari Expo in September 1986.
The system combines standard hard disk units with BTL's own customized Atari
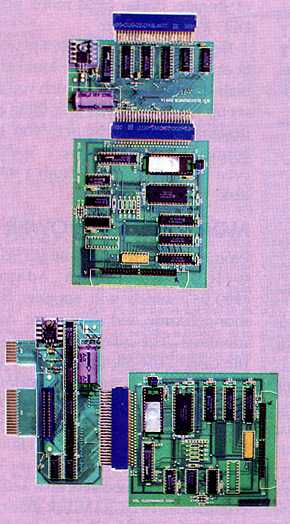
interfaces. The BTL 2001 (for 800XL) or 2002 (for 130XE) connect to the
computers parallel bus slot. The BTL 2004 Hard Disk Adapter attaches to a
standard SASI hard disk controller-and supports one or two hard drives for a
potential total of 128 megabytes of information storage. BTL packages complete
hard disk systems up to 60Mb. Or you can supply your own hard disk and just
purchase the adapter and connector.
BTL ships the hard disk and its case in two separate boxes. Assembly takes just a couple of minutes and consists of connecting a few plugs and installing four screws. Our advance unit came with a preliminary version of the documentation, which is thorough and easily understood.
Insert a 2001 or 2002 connector into the back of your XL or XE. The hard disk adapter plugs into the rear of the connector. You will need approximately ten inches of clear space at the rear of your computer to accomodate the boards. The boards are not enclosed in anything, so a nice upgrade would be a high-quality plastic case.
For clarity, the rest of this review will refer to these two boards together as "the interface." The interface receives its power from a small DC adapter which plugs into an electric outlet. A 50-pin ribbon cable from the hard disk controller plugs into the interface.
The BTL drive comes already formatted, so you should now be able to turn on the hard disk and-as soon as it comes up to speed-boot from it by switching on your Atari.
If you are using your own hard disk, instead of a hard disk sold by BTL, you may need to format and partition it. Partitioning is simply a process of dividing disk space so that the computer thinks of it as separate disk drives of selected sizes. The interface can handle as many as eight logical drives (partitioned disk sections) of up to 16 megabytes each. That's the potential 128Mb maximum again.
The interface comes with its own firmware and uses none of your computer memory. To start the formatting and partitioning program you must turn off the computer and move a small switch on the interface. After turning on the computer again, you will see a menu from which you select an operation to perform. The documentation helps you through this process, which is really not difficult. Numbers are entered in hexadecimal, so you will need to be able to convert decimal sector counts into hex. The latest version of the firmware includes a head parking command which you should use any time you transport the drive.
After logical drives are partitioned, you will need to format them-either with MYDOS which is supplied by BTL, or with ICD's SpartaDOS 3.2 (reviewed in the adjoining article). Both Disk Operating Systems work fine with the BTL Hard Disk. MYDOS requires reconfiguring your drive assignments, which is one of its menu options. In the event you do have trouble setting up your system, a tech line is available for assistance from the company.
Once your system is in place and working, you will be delighted with the speed of transfer and the vast amounts of disk storage space you now have. Turning on your Atari with the [SELECT] key pressed will allow you to boot from your floppy drive 1 as usual. Our version of the firmware simply replaces the floppy for logical drive 1 from the hard disk. But the latest version actually "bumps up the drive numbers by one, so that hard drive 1 would now appear to your computer as drive 2 and would still be available.
The BTL Hard Disk System is a good product that merits your consideration. We have found its performance to be reliable and efficient, at a competitive price that brings hard disks within reach of many 8-bit Atari users.
BTL HARD DISK
William Lurie & Associates
P.O. Box 7546
Van
Nuys,CA 91409
(818) 780-1723
Requires Atari 800XL or 130XE
$550-10Mb
with MYDOS