 I've
always found computer manipulation and display of three dimensional
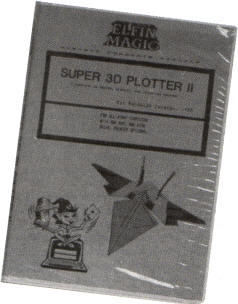
images fascinating to watch. This £29.99 package from Demon Software
brings the capability to any 8-bit Atari with 48K or more, a disk
drive, and a joystick. Optionally, you can use a printer to produce
hard copy of your 3D images.
I've
always found computer manipulation and display of three dimensional
images fascinating to watch. This £29.99 package from Demon Software
brings the capability to any 8-bit Atari with 48K or more, a disk
drive, and a joystick. Optionally, you can use a printer to produce
hard copy of your 3D images.
BETTER PACKAGING NEEDED?
My first impression of the package wasn't
favourable. The cheap plastic packaging and dot matrix printed 56
page instruction manual on gaudy green and yellow paper did little
to convince me I was handling quality software. The bright green(!)
double sided disk and poor quality keyboard reference card didn't
help either. Demon Software have indicated however that they are
improving the packaging and providing a fully typeset manual which I
feel is essential for any software at this price.
DISPLAYING IMAGES
Booting up the disk produced a message saying that
the program was on side 2! Side 1 contains data files - hmm....
different, anyway! The program's driven by a combination of menu
selection, keyboard function keys, and direct joystick input,
depending on what you're doing. This sounds messy, but in practice
worked surprisingly well. In fact, I found the user interface to be
unexpectedly friendly.
The manual is written mainly in the form of a
tutorial, and starts you off displaying and manipulating 3D images
with the package. Some of these are fairly simple, such as a tube,
while others, like the aircraft and TIE fighter, are considerably
more complex.
Choosing 'Load' from the main menu produced a
listing of the image files held on the disk. Selection of one of
them resulted in a screen display showing a 3D wire frame image of a
futuristic looking aircraft, positioned as if flying out of the
screen towards you.
Console keys let you switch between high, medium
and low resolution displays, produce black on white, or white on
black display in high and medium resolution, and cycle background
colours in low resolution mode. My preference was to use a black
image on white background in high resolution mode.
Using the keyboards, you can then rotate the image
about its X, Y or Z axis. The aircraft image can thus be viewed from
any angle. Rotation is 'animated', in that once begun it continues,
moving the image around the chosen axis a few degrees at a time
while you watch. Speed of rotation may be continually varied by
keyboard control. Maximum speed is governed by complexity of the
image and resolution of the display. At maximum speed in hi-res
mode, the aircraft rotated completely about the chosen axis in about
25 seconds, at about 2 screen displays per second. Incidentally,
there's no flicker as the image is redrawn.
You can instantly freeze the image in any
position, or slow down, or reverse the rotation as required. Also,
you can rotate the image about any one, two or all three axes
simultaneously, making the image 'tumble' on the screen as if in
zero gravity.
A clever feature of the program is that as it
rotates the image, the correct perspective is maintained. So if we
rotate the aircraft from its original position through 180 degrees
so it appears to be flying away from us, the tail fins now appear
much larger than the nose. This gives the eye important visual clues
as to the orientation of the image. A wire frame graphic can be very
difficult to recognise without this.
Two more pairs of keys control viewing distance
and magnification. Both control the size of the image on the screen,
the former giving a gradual 'zoom' in or out effect, while the
latter enlarges or reduces the image by a factor of two at each key
depression, and alters the perspective effect. By using both
together you can produce a perspective to suit your preference.
SOLID IMAGES
The program has the ability to 'remove hidden
surfaces' from the displayed image, giving it a more 'solid'
appearance. In effect, it removes the lines at the back of the image
you can't normally see. In a wire frame type image these are on view
all the time, of course. The only snag is, there's a lot more
processing involved, so the speed of rotation is reduced by about
half.
After removing hidden surfaces you can have the
resultant image colour filled. This, surprisingly, seems to make
little difference to the speed of rotation, but gives the image an
even more realistic appearance. In medium and hi-res modes, three
shades of fill are available, namely black, white and an artifacted
pattern. In low-res mode, the image is filled with green, dark blue
and purple, while the background can be set at any colour you like.
As with the packaging, this wouldn't have been my choice of colours,
but does clearly delineate the different surfaces of the image.
IMAGE TRAILS
Normally, the program erases an image before
drawing the next one in a rotation sequence, but you can turn off
the erase function. This results in a trail of images on the screen,
leading to some fascinating 'computer art' effects. The effect can
be further enhanced by switching into 'Exclusive-OR' mode, which
changes the colour of line intersections, and also by offsetting the
axes of rotation from their normal 'zero' position.
Saving a complete screen in Micropainter format is
possible at any time. You could then load it into an art program,
screen dump program, or other picture file utility for additional
processing. A further feature lets you load a Micropainter format
screen into this program as a background to your image.
These features give clues as to the possible
practical uses for the package. How about drawing a simple 3D image,
manipulating it to get the best viewing angle and perspective, and
then loading it into an art program like Micropainter for adding
detail and background work? Or turning off the erase function and
doing the same thing with a trail of images? This could be a great
help to struggling computer artists, and could also be a big time
saver.
CREATING IMAGES
The tutorial continues by showing you how to
create your own images, beginning with advice on how to prepare an
image for input. For best results you really have to produce a paper
and pencil drawing first, and work out the X, Y, and Z co-ordinates
of the important points, and connecting lines between them. This can
be hard work for a complex image!
Having defined your points and lines you can enter
them in one of two ways. The 'fun' way is to use the Interactive
Graphic Editor, which lets you draw the image on the screen using
joystick (and occasional keyboard) input.
The tutorial steps you through the drawing of a cube with a hole cut
through its centre. At first sight, even this simple example looks
daunting, but in practice, using the Interactive Graphic Editor, it
really is quite easy - I managed to produce a correct 3D image at
the first attempt.
The interactive editor uses a 'rubber banding'
technique for line drawing, like that used in most art programs.
It's this feature plus the fact that the program tells you when
you've connected with an existing point which makes accurate drawing
possible. For real accuracy, though, there's another way of creating
images, and that's by using the Data Editor. This isn't nearly so
much fun as the interactive editor, as you key in all co-ordinates
and point connections into tables. It's difficult to visualise the
image as you're doing this, making it essential to do the paper and
pencil drawing first. Either editor can be used for changing
existing images, to correct mistakes, for example.
Following basic image construction techniques, the
tutorial goes on to tackle more advanced features of the program,
such as creating surfaces rather than lines, so you can use the
hidden surface removal facility, merging of multiple images, and use
of screen overlay facility. The manual also includes details on the
technical aspects of the program, such as the mathematics used in
calculating the 3D image rotation points, and how it was programmed.
PRINTING THE IMAGES
Two image printing facilities are provided, both
intended for use with Epson compatible printers. The first of these
is designed to work only with hi-res wire frame images, and produces
an A4 size printout. The other works in medium or hi-res, with
hidden surface removal and/or colour fill if required, and produces
a printout filling one quarter of an A4 page. Both produce hard copy
of good quality.
A BASIC program included in the package enables
you to modify the print function to suit your printer. I didn't use
this, as my Star SG10 is Epson compatible, and worked happily
without changes being necessary. However, the BASIC program looked
quite straightforward to use, assuming you know the control codes
your printer needs to switch it into graphics mode.
CONCLUSIONS
After being put off initially by the packaging, I
grew to like this program. I was impressed by its ease of use,
thanks to its good user interface and clearly written manual
(despite the awful colours, spelling mistakes, and dot matrix text).
I was also impressed by its reliability and performance. No doubt
the 16-bit ST could make it look silly, but considering the
limitations of the 8-bit architecture, I think the author has done
an excellent job.
For £29.99 I certainly expect better packaging and
presentation, especially as far as the instruction manual is
concerned. Indeed, the program deserves far better. This aside,
Super 3D Plotter II should give you hours of pleasure and enjoyment
if you're interested in exploring the world of three dimensional
graphics. With the promised repackaging and improved manual my only
major criticism will be removed and I can certainly give the program
my full recommendation.
top