 A
scanner could cost you up to £1000 and although digitisers are more
reasonable you still need a video camera. Is there a cheaper
alternative?
A
scanner could cost you up to £1000 and although digitisers are more
reasonable you still need a video camera. Is there a cheaper
alternative?
John S Davison finds one that seems to do the
job
Ladbroke Computing
£99.99
This has to be one of the most innovative accessories
for the ST yet. It's a device for scanning and digitizing images
without using an expensive video camera. In fact it's not video
based at all, but works on a similar principle to a fax machine.
This means IMG Scan can only digitize printed material. It's capable
of handling photographs, drawings, pictures from magazines, and
similar items.
To achieve this at such a low price the designers obviously had to
make compromises. The main one was that they only provide the
software and optics of the scanner – YOU have to provide the
scanning mechanism. This doesn't mean you need a degree in
mechanical engineering, as you may already own the necessary
equipment without realising it, your printer!
This isn't as crazy as it sounds, just a product of lateral
thinking. Consider this for a moment – a dot matrix printer can
reproduce acceptable pictures and graphics by building them up from
rows of dots. What if we could reverse this process and cause the
print head to become a 'read head', and recreate an existing printed
picture as a pattern of pixels in memory? Well, it's now possible –
IMG Scan does just that!
In fact IMG Scan goes one better than that. It doesn't simply read
dots from the paper – it actually measures and digitizes the image
brightness levels at many points along each line. This makes it
possible to digitize an image containing varying continuous tones
such as those found in photographs.
The only requirement is that your printer should be capable of
handling one-time variable form feeds – no problem for most graphics
capable dot matrix printers. IMG Scan comes pre-configured for use
with Epson compatible printers, but you can easily reconfigure it
for your own printer. My Star SG10 worked fine on the Epson
setting after some initial experimentation with its DIP switches.
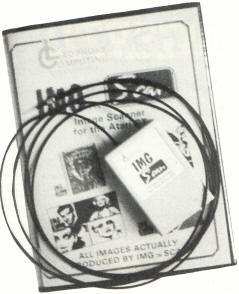
The package includes an ST cartridge and image cable; a disk
containing scanning and ancillary software; a photocopied picture
for test scanning; and an inadequate eight page instruction booklet
(with a small supplementary README file on disk).
THE HARDWARE
Emerging from the cartridge is the 'image cable' – in reality a pair
of flexible fibre optic cables each about three feet long. These
cables are clipped together at their. free ends, with the two
exposed fibres constituting the 'read head'. With the cartridge
plugged into the ST's cartridge port and the power turned on, a dull
red light can be seen shining dimly from the
end of one of the cables. Apparently IMG Scan uses infra-red light
to illuminate the image it's scanning, with the light source
contained in the cartridge. This is good design, as it provides
immunity to variation in ambient light levels.
The other cable 'reads' the light reflected from the image and
directs it to an infra-red sensor, again located inside the
cartridge. Other circuitry must then convert this analogue signal
into digital values and feed them to the software for processing and
display.
Before using the system you have to remove the printer ribbon and
attach the free end of the image cable securely to the print head,
with the fibres pointing straight at the paper. The optimum position
can be found with help from the scanning program. With white paper
in the printer the end of the image cable may be moved back and
forth until the lowest possible reading is obtained on a scale
displayed on the monitor. You then fix the cable in place.
The main problem here is that Ladbroke provide no means of attaching
the cable to the print head, merely suggesting you use sticky tape.
With a bit of thought I'm sure they could have provided something
better, perhaps based on Velcro pads?
You also have to be careful that the cable can't catch on any of the
internal parts of the printer during scanning. Forget this and you
could end up with a nasty (and possibly expensive) mess on your
hands.
THE SOFTWARE
 The
disk contains a number of programs, the main ones being those
involved in scanning. The scanning program comes in two versions,
for high and low resolution displays. The low-res program handles 16
shades of grey and is more advanced than the high-res version, which
currently only operates in a simple black/white mode. A new release
with grey scale support is promised soon, available free to
registered users. I used only the low-res version for this review.
The
disk contains a number of programs, the main ones being those
involved in scanning. The scanning program comes in two versions,
for high and low resolution displays. The low-res program handles 16
shades of grey and is more advanced than the high-res version, which
currently only operates in a simple black/white mode. A new release
with grey scale support is promised soon, available free to
registered users. I used only the low-res version for this review.
The scanner program is mainly mouse controlled, with keyboard input
necessary only when you want to change its basic operating
parameters. It has a menu screen and an image display screen, the
former containing the system's main controls and the latter used for
viewing scanned images.
Before a picture is scanned you have to calibrate the system using
the scanner program's 'Auto Grey Adjust' feature. This involves
performing a single pass calibration scan across the picture's area
of greatest contrast to determine the picture's distribution of grey
tones.
A full scan may then be done. With the top of the picture level with
the image cable, a click on the 'scan' box causes the menu screen to
be replaced by the blank image screen and scanning begins.
The scanning program drives the print head back and forth across the
picture. On each left-to-right pass the image cable digitizes a
strip of the picture producing up to 320 data points, each set to
represent a shade of grey. These are used to plot pixels of the
appropriate shade on the screen as the scan progresses. It's
fascinating to watch as the picture slowly grows into a recognisable
image before your eyes.
After each pass the paper is advanced, the print head returned, and
the process repeated. This continues either until you interrupt it
or a full screen image (200 lines) has been generated.
Printer and screen scan line widths may be varied independently, so
it's possible to 'squeeze' and 'stretch' the image to some extent
during the scan. There are also zoom and positioning controls
allowing parts of a picture to be picked out and displayed on-screen
in different sizes. It takes up to about 6-7 minutes for a complete
scan depending on the image size required.
It's possible to interrupt the scan at any point, make the picture
lighter or darker, and continue scanning where it left off. In fact,
this can be done with completed images too. The program contains
clever facilities for adjusting and recalculating the grey scale to
produce a contrast range to your liking or to bring out the image's
finer detail.
COLOUR IMAGES
IMG Scan digitizes to 16 grey levels, but the ST hardware limits you
to displaying only eight of them. This is achieved by pairing
levels, which results in loss of image detail. To retrieve the
detail you can use shades other than grey. In fact, you don't have
to use grey shades at all as it's possible use colours instead. By
assigning a colour to each of the 16 grey levels via on-screen RGB
sliders you can achieve up to 16 different colours. It's not the
same as a true colour scan, of course, but with care and the right
subject you can produce pleasing results. The disk contains several
examples in grey shades and colour, showing just how impressive the
results can be.
The completed image may be saved to disk as raw data, or in DEGAS or
NEOCHROME format. This opens up the possibility of further editing
and embellishment using those programs. It also gives compatibility
with many other graphics oriented utilities now available –
including desktop publishing systems. So at last there's a low cost
method of getting digitized photographs into your publications!
The disk also contains a utility called AIM, designed to improve
clarity, extract features and add special effects to scanned images
according to the README file. There were no instructions whatsoever
for using it, and my attempt to load it was greeted with a message
saying it needed more than the available 512K to run in. Pity, it
sounds interesting.
Other software on the disk includes a utility to convert image data
into AIM format and back again, and one to convert image or AIM
files to POSTSCRIPT format for printing on a suitably equipped laser
printer. There's also a simple 'picture show' program for displaying
the three sample images provided.
IS IT PRACTICAL?
Yes, it works – and surprisingly well. It takes practice to produce
good results, but it's well worth the effort. The basic hardware and
software does everything Ladbroke claim, and if they're true to
their word there's even better to follow as the software is
developed further.
It's worth noting that all software updates will be available free
to registered users, a very enlightened and welcome approach by
Ladbroke.
One thing they really must do is produce a decent instruction manual
– talk about spoiling the ship for a ha'porth of tar! And a quick
and effective method of attaching the image cable to the print head
is desperately needed too.
These are minor niggles though and if you need an inexpensive method
of getting digitized pictures into your ST then this is it.
top